Note: The [Orders] label is configurable in the application. Other labels such as [Requests] can be used. For simplicity, [Orders] is used throughout the Help.
Orders Inbox Help
- Open Orders Inbox
- Filter Orders
- Update Order Status
- Sort Orders Inbox
- Manage Inbox Columns
- Manage Page Size
- View Order
- View Patient Summary
- Order Status and Allowable Action
- View Patient Documents
- View Order History
- Print Order
- Print Multiple Orders at One Time
- Archive Order
- Archive Multiple Orders at One Time
- Print Work List
Open Orders Inbox
From the menu bar, select Orders to open the Orders Inbox.
Filter Orders
Use filters to search the Orders Inbox for orders. Select Filters to expand and collapse the filters section. You can save an unlimited number of filters.
For more information about filters, see the Filter Orders topic.
Update Order Status
An order is displayed in the inbox for the group that submitted the order and for the group that received the order. Whether you can update or change the order's status depends on the order's type, its status, and the group that has control of the order during each stage of the order workflow.
Complete the following steps to update an order:
- Open Orders Inbox.
- Select the ID, or select Actions > Open for the order you want to update.
- Update the order as necessary.
- Scroll to the bottom of the order.
- Select the button that corresponds to the status you want to assign this order.
- Optionally, enter a comment that describes your updates.
For more information about controlling groups and allowable actions, see Order Status and Allowable Action List.
Sort Orders Inbox
If you want to sort your Orders Inbox, select any column heading. An up arrow () indicates an ascending sort order, for example, a to z; 1 to 10; oldest date to most recent date. A down arrow () indicates a descending sort order, for example, z to a; 10 to 1; most recent date to oldest date.
Manage Inbox Columns
The first time you access the Orders Inbox, default columns are displayed. Each portal inbox has a set list of available columns and a default subset of active columns. You can hide or display each of the available inbox columns.
Note: If you change the default inbox columns, there is no automatic way to revert to the default. You must do it manually. Before making a change, note the default columns. If you want to revert to the default, manually hide or display columns to match the default.
Complete the following steps to manage inbox columns:
- If you want to see all available columns, select Columns.
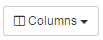 Available columns are listed. Active columns are checked.
- If you want to hide a column, deselect the column's check box.
- If you want to display a column, select the column's check box.
Your column selections persist until you change them.
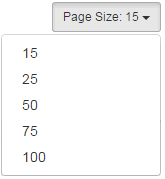
Manage Page Size
If you want to change the inbox page size, from the Page Size list, select the number of order records you want displayed per page.
 The system reloads the page and displays the requested number of order records per page.
View Order
To view an order, select its ID or Actions > Open.
View Patient Summary
To access a patient's Patient Summary, select Patient Name or Actions > Patient Summary.
See Also: Patient Summary Overview
Order Status and Allowable Action
For an explanation of each Order Status, see the Order Status and Allowable Action List.
View Patient Documents
To access a patient's documents, select Actions > Documents or select Patient Name to access Patient Summary view, then select the Documents tab.
See Also: Patient Summary - Documents
View Order History
To view an order's history, select Actions > History. The Order History dialog box opens. Select Close to return to the Orders Inbox.
Print Order
Complete the following steps to print one order from the Orders Inbox:
- Open Orders Inbox.
- Select the order's check box.
- Select Print to open the document viewer. The order is displayed.
- Select Print on the document viewer toolbar.
- Make your browser-specific print selections and print the order.
- Select Close to close the document viewer and return to Orders Inbox.
- If you want to deselect the order, select its check box.
Note: Provider Portal does not support functions provided by your browser context menu such as print, select all, and copy. Your browser context menu is suppressed in the portal's document viewer. When you right-click in the document viewer, an "Unsupported Action" message is displayed. Click here for more information about printing in Provider Portal.
Print Multiple Orders at One Time
Complete the following steps to print multiple orders at one time from the Orders Inbox:
- Open Orders Inbox.
- Select each order's check box.
- If you want to select all orders on a page, select the column heading check box.
- Select Print to open the document viewer. The orders are displayed.
- Select Print on the document viewer toolbar.
- Make your browser-specific print selections and print the orders. Page breaks occur between the orders.
- Select Close to close the document viewer and return to Orders Inbox.
- If you want to deselect specific orders, select their check boxes.
- If you want to deselect all orders on a page, use the column heading check box.
Note: Provider Portal does not support functions provided by your browser context menu such as print, select all, and copy. Your browser context menu is suppressed in the portal's document viewer. When you right-click in the document viewer, an "Unsupported Action" message is displayed. Click here for more information about printing in Provider Portal.
Archive Order
Use the Archive function to move an order from the Inbox tab to the Archive tab in the Orders Inbox.
Complete the following steps to archive an order:
- Select Actions > Archive or select the order's check box and select Archive.

- Select OK on the confirmation window.
- If you want to see archived orders, select the Archive tab in the Orders Inbox.
Archive Multiple Orders at One Time
Use the Archive function to move multiple orders from the Inbox tab to the Archive tab in the Orders Inbox.
Complete the following steps to archive multiple orders at one time:
- Select each order's check box, then select Archive.
- Select OK on the confirmation window.
- If you want to see archived orders, select the Archive tab in the Orders Inbox.
Print Work List
Note: Print work list applies to orders that use the new laboratory order form only. The new laboratory order form was added with portal version 5.1.0. The Print Work List function is available to authorized users only.
Use the Print Work List function to view and print a list of laboratory orders from the Orders Inbox. The Inbox must contain only laboratory orders when you use this function.
Complete the following steps to view and print a work list:
- Open Orders Inbox.
- If the filters section is collapsed, select Filters to expand it.
- Use the date filters to select a date range.
- From the Form Type list, select laboratory orders. If your inbox contains only laboratory Form Types, you can select All.
- Select Apply. The system filters the inbox.
- Select Print Work List. The document viewer opens.
- From the document viewer toolbar, select Print.
- Make your browser-specific print selections and print the work list.
- Select Close to close the document viewer and return to the Orders Inbox.
Note: Provider Portal does not support functions provided by your browser context menu such as print, select all, and copy. Your browser context menu is suppressed in the portal's document viewer. When you right-click in the document viewer, an "Unsupported Action" message is displayed. Click here for more information about printing in Provider Portal.