Health Care Documents provides an organized way to view a patient's documents.
Note: If a result you expect to receive is not listed on the Health Care Documents page, contact the ordering provider to get the result.
Help Topics on This Page
- Go to Health Care Documents
- View by: Document Type; Date; Visit
- Open/Close Document Groupings
- Check All/Uncheck All
- Open All/Close All
- Filters
- Change Column Width
- Sort
- View One Document
- Actions: View Documents
- Actions: View Documents Without Breaks
- Actions: Download Documents
- Actions: Send Documents Securely
Go to Health Care Documents
Go to Health Care Documents using one of these options:
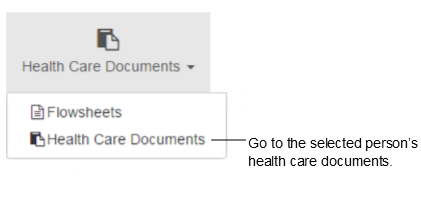
- Option #1: Select Health Care Documents in the menu bar. If a menu opens, click Health Care Documents again to display the selected patient's documents.
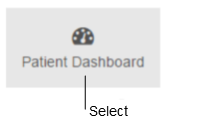
- Option #2: Go to Health Care Documents from Patient Dashboard.
- Select Patient Dashboard in the menu bar.
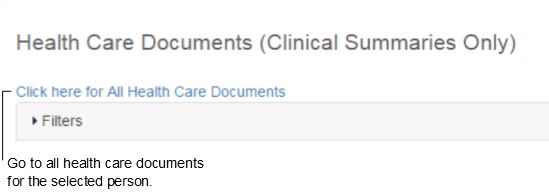
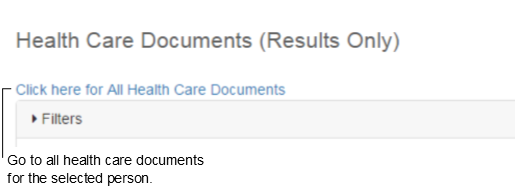
- From either the My Clinical Summaries or the Results content pane, click View More.
- Then click Click here for All Health Care Documents.
View by: Document Type; Date; Visit
There are three ways to view patient documents: (1) by Document Type; (2) by Date; (3) by Visit.
Note: The active view when you leave Health Care Documents is the default view when you return to Health Care Documents. Also, the selected view will immediately be applied to all three Health Care Documents pages: (1) Health Care Documents; (2) Health Care Documents (Results Only); (3) Health Care Documents (Clinical Summaries Only).
Document Type View: 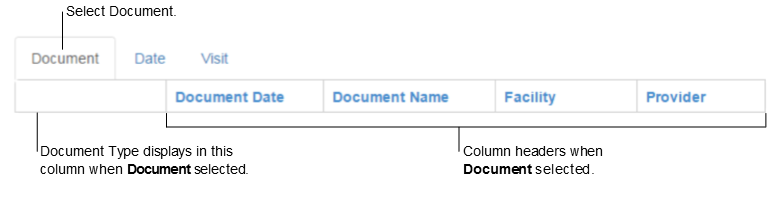
Date View: 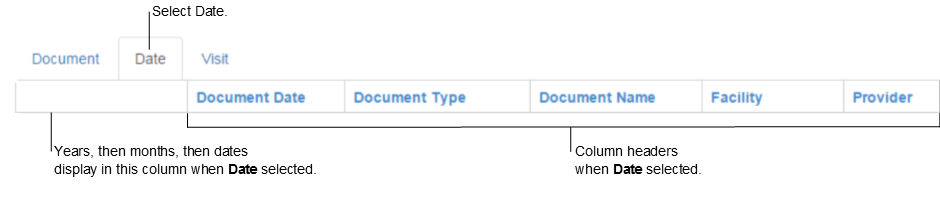
Visit View: 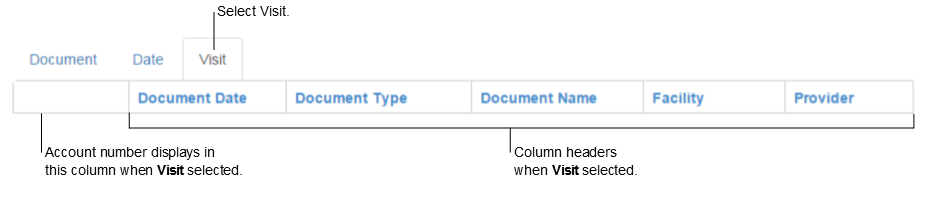
Open/Close Document Groupings
- To open a grouping, click right arrow.
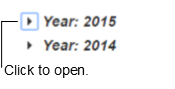
- To close a grouping, click right angle.
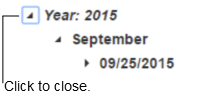
- To open all groupings at once, click Open All.
- To close all groupings at once, click Close All.
Check All/Uncheck All
- Click Check All to select all documents.
- Select an action to perform against all documents.
- Click Uncheck All to deselect all documents.
Open All/Close All
- To expand all document groupings, click Open All.
- To collapse all document groupings, click Close All.
Filters
Use Filters to narrow your search for documents.
- Applying filters is not dependent on the expansion level of the folders. Folders can all be closed, all open, or anywhere in-between when a filter is applied.
- Filter selections applied when you are on the page are not saved when you leave the page.
- Available filters:
- Document Name
- Document Type
- Facility
- Document Date Range
- If filters are collapsed, click Filters to expand.
- Enter or select values for one or more filters.
- Click Apply.
- Documents matching the filter criteria are displayed. If no documents meet the criteria, no documents will be displayed.
- When filters are applied:
- The number of documents that meet the criteria, and the total number of documents, are displayed alongside a blue box indicating the results are filtered.
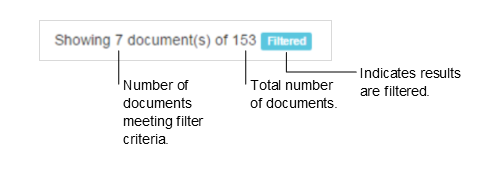
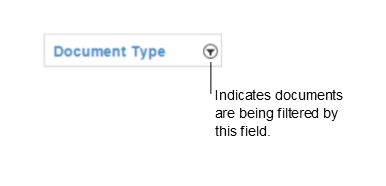
- An icon is displayed next to each column header field that is applied as a filter.
Change Column Width
- Position mouse over vertical line between column headers.
- When you see <-||-> click and hold while dragging boundary line.
- Release mouse when done.

Sort
- The sort is specific to each grouping in the active view.
- The sort stays active when a new view is selected.
- Click a column header field.
- An up arrow next to the field indicates an ascending sort order, for example, a to z.
- Click the header field again.
- A down arrow indicates a descending sort order, for example, z to a.
- Click the header field a third time to remove the sort.
View One Document
Complete the following steps to View, Send, Print, or Download one document:
- Select one of the following options and complete the steps to select a document:
- Highlight Option
- Position your pointer over the document row to highlight the row.
- Select the row. The Document Viewer opens and the document is displayed.
- Check Box Option
- Select the document's check box.
- Select View Documents from the Actions list. The Document Viewer opens and the document is displayed.
- If you want to create a new secure message and attach the document, select Send.
- If you want to print the document, complete the following steps:
- Select Print on the Document Viewer toolbar.
- Make your browser-specific print selections and print the document.
- If you want to download the document to your device, complete the following steps:
- Select Download on the Document Viewer toolbar. The Download Document dialog box opens.
- Select .PDF or .ZIP (compressed) file format.
- If you select .ZIP, select your .ZIP File Options
- Select Download.
- Complete any browser-specific steps to complete the download.
- Select Close to close the Document Viewer and return to Health Care Documents.
- If you want to deselect the document, select its checkbox.
Note: The patient portal application does not support functions provided by your browser context menu such as print, select all, and copy. Your browser context menu is suppressed in the application's Document Viewer. When you right-click within the Document Viewer, an "Unsupported Action" message is displayed. Click here for more information about printing within the patient portal application.
Actions: View Documents
When at least one document is selected, the View Documents function is available in the Actions list.
Complete the following steps to view one or more documents using View Documents:
- Open groupings until you see documents listed.
- Select each document's check box.
- Select View Documents from the Actions list. The Document Viewer opens and the documents are displayed.
- If you want to create a new secure message and attach the documents, select Send.
- If you want to print the documents, complete the following steps:
- Select Print on the Document Viewer toolbar.
- Make your browser-specific print selections and print the documents. The documents print with page breaks.
- If you want to download the documents to your device, complete the following steps:
- Select Download on the Document Viewer toolbar. The Download Document dialog box opens.
- Select .PDF or .ZIP (compressed) file format.
- If you select .ZIP, select your .ZIP File Options
- Select Download.
- Complete any browser-specific steps to complete the download.
- Select Close to close the Document Viewer and return to Health Care Documents.
- If you want to deselect specific documents, select their check boxes.
- If you want to deselect all documents, use Check All and Uncheck All.
Note: The patient portal application does not support functions provided by your browser context menu such as print, select all, and copy. Your browser context menu is suppressed in the application's Document Viewer. When you right-click within the Document Viewer, an "Unsupported Action" message is displayed. Click here for more information about printing within the patient portal application.
Actions: View Documents Without Breaks
When at least one document is selected, the View Documents Without Breaks function is available in the Actions list. Use this function if you want to make maximum use of the space on each page.
Complete the following steps to view documents using View Documents Without Breaks:
- Open groupings until you see documents listed.
- Select each document's check box.
- Select View Documents Without Breaks from the Actions list. The Document Viewer opens and the documents are displayed.
- If you want to create a new secure message and attach the documents, select Send.
- If you want to print the documents, complete the following steps:
- Select Print on the Document Viewer toolbar.
- Make your browser-specific print selections and print the documents. The documents print without page breaks.
- If you want to download the documents to your device, complete the following steps:
- Select Download on the Document Viewer toolbar. The Download Document dialog box opens.
- Select .PDF or .ZIP (compressed) file format.
- If you select .ZIP, select your .ZIP File Options
- Select Download.
- Complete any browser-specific steps to complete the download.
- Select Close to close the Document Viewer and return to Health Care Documents.
- If you want to deselect specific documents, select their check boxes.
- If you want to deselect all documents, use Check All and Uncheck All.
Note: The patient portal application does not support functions provided by your browser context menu such as print, select all, and copy. Your browser context menu is suppressed in the application's Document Viewer. When you right-click within the Document Viewer, an "Unsupported Action" message is displayed. Click here for more information about printing within the patient portal application.
Actions: Download Documents
When at least one document is selected, the Download Documents function is available in the Actions list. Use this function to download documents to your device.
Complete the following steps to download documents to your device using Download Documents:
- Open groupings until you see documents listed.
- Select each document's check box.
- Select Download Documents from the Actions list. The Download Document dialog box opens.
- Select .PDF or .ZIP (compressed) file format.
- If you select .ZIP, select your .ZIP File Options
- Select Download.
- Complete any browser-specific steps to complete the download.
- If you want to deselect specific documents, select their check boxes.
- If you want to deselect all documents, use Check All and Uncheck All.
Actions: Send Documents Securely
When at least one document is selected, the Send Documents Securely function is available in the Actions list. Use this function to attach documents to a secure message within the patient portal. Secure Messaging is not for communicating urgent health problems or requesting same-day appointments.
Complete the following steps to create a new secure message and attach documents to it using Send Documents Securely:
- Open groupings until you see documents listed.
- Select each document's check box.
- Select Send Documents Securely from the Actions list. The Select Recipients dialog box opens.
- Select Recipients*. Select OK when done. The New Secure Message dialog box opens.
- If you want to change message recipients, select Add.
- If you want to add more attachments, select Add or Edit Attachments. Click here for information about Add Attachments.
- If you want to delete an attachment, select X next to it.
- Enter message Subject. Subject is required.
- If you want to include a message, enter it in the message body editor window.
- Select Send.
*Select only one recipient per practice/group. To ensure a timely reply, all of the recipient's practice/group staff members can see your message and respond to it.