Use filters to specify criteria and search the Patient MRN Overlay Queue. The system displays the records that match your criteria.
Filter Patient MRN Overlay Queue Help
- Filters Applied Indicator
- Default Filter Values
- Patient MRN Overlay Queue Filter Parameters
- Apply Filters
- Filters - Actions
Filters Applied Indicator
The Filters Applied indicator is a quick way to see the filters applied to the Patient MRN Overlay Queue. When filters are applied, the records matching the filter criteria are displayed in the Queue. Change the filters to change the records listed in the Queue.
From the Patient MRN Overlay Queue, select Filters Applied to display the active filters.
Note: The system displays the following label on the Filters Applied button when no filters are applied: No Filters Applied. See the Default Filter Values topic for related information.
Default Filter Values
The Patient MRN Overlay Queue is deployed with the following default values for the Begin Date and Status filters:
- Begin Date: The default Begin Date is 30 days before the current date.
- Status: The default Status includes the following record statuses:
The default status values indicate records that are suspect because the system did not complete them based on a configured pattern. Records in In Process, New, or On Hold statuses require follow-up.
Apply different filters to change the records listed in the Queue. When you select Clear, the default filter values are restored. See the Apply Filters and Filters - Actions topics for more information.
Patient MRN Overlay Queue Filter Parameters
When you apply filters, the records that meet your filter criteria are displayed. The following filter parameters are available in the Patient MRN Overlay Queue:
| Patient MRN Overlay Queue Filter Parameters |
| Filter Parameter |
Description |
| Patient MRN |
At least one character that the patient's medical record number contains. |
| Patient Account Number |
At least one character that the patient's account number contains. |
| Begin Date* |
The default begin date is 30 days before the current date in mm/dd/yyyy format.* |
| End Date* |
The end date in mm/dd/yyyy format. |
| From Patient Last Name |
The first letter of the patient's last name (at a minimum). |
| From Patient First Name |
The first letter of the patient's first name (at a minimum). |
| From Patient DOB |
Patient date of birth in mm/dd/yyyy format. |
| From Patient SSN |
At least one digit that the patient's Social Security number contains. This element has a maximum length of 11 characters and dashes are optional. |
| From Patient Gender |
The options for gender are derived from actual values on the Queue table. The following options may be available:
- F (Female)
- M (Male)
- U (Unknown)
|
| To Patient Last Name |
The first letter of the patient's last name (at a minimum). |
| To Patient First Name |
The first letter of the patient's first name (at a minimum). |
| To Patient DOB |
Patient date of birth in mm/dd/yyyy format. |
| To Patient SSN |
At least one digit that the patient's Social Security number contains. This element has a maximum length of 11 characters and dashes are optional. |
| To Patient Gender |
The options for gender are derived from actual values on the Queue table. The following options may be available:
- F (Female)
- M (Male)
- U (Unknown)
|
| Facility |
Complete the following steps to select facilities:
- Select the Facility box. A list of facilities is displayed.
- Select facilities from the list. The facilities are added as filter parameters.
- If you want to remove a selected facility, you can select the associated X.
- If you want to remove all selected facilities, you can select the X in the upper-right corner of the Facility box.
|
| Status* |
- All
- Completed, Issue Resolved
- Completed, No Issue
- In Process*
- New*
- On Hold*
- System Completed, No Issue
Complete the following steps to select statuses:
- Select the Status box. A list of statuses is displayed.
- Select statuses from the list. The statuses are added as filter parameters.
- If you want to remove a selected status, you can select the associated X.
- If you want to remove all selected statuses, you can select the X in the upper-right corner of the Status box.
|
*This filter value is set by default when the tool is initially deployed. See the Default Filter Values topic for more information.
Apply Filters
When you apply filters, the records that meet the selected filter criteria are displayed in the Patient MRN Overlay Queue.
Complete the following steps to apply filters to the Patient MRN Overlay Queue:
- From the Patient MRN Overlay Queue, select Filters to expand the filters section.
- If you want to remove all previous filters and restore the default filters, you can select Clear.
- Enter or select filter values. See the Patient MRN Overlay Queue Filter Parameters topic for more information on filter parameters.
- Select Apply. The records that meet the filter criteria are displayed.
- If you want to temporarily clear the filters, you can select Clear (the filters will still be active the next time you access the Patient MRN Overlay Queue).
- If you want to permanently clear the saved filters, you can select Clear followed by Save.
Filters - Actions
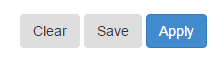
-
Select Apply to apply the selected filters to the Patient MRN Overlay Queue.
-
Select Save to save the selected filters as your Patient MRN Overlay Queue default for subsequent use.
-
Select Clear to temporarily clear your filters (the filters will still be active the next time you access the Patient MRN Overlay Queue).
-
Select Clear followed by Save to permanently clear your saved filters.