The Results Inbox is populated with real-time patient documents routed to your practice, for example, lab results, radiology reports, transcribed documents, admission and discharge notifications, cardiology reports, pathology reports, and emergency department notifications. The Critical Results feature was added in Provider Portal 7.1. In your Results Inbox, you can view, print, filter, sort, assign, unassign, make comments, and move results out of your inbox.
Note: If you do not see an expected result for a patient in the Results Inbox, perform a Patient Search on the patient, then view the patient's documents (select Actions > Documents). The system displays the document grid, which contains all documents your practice or facility received pertaining to the patient.
Results Inbox Help
- Open Results Inbox
Organize Results Inbox
- Filters
- Sort Results Inbox
- Hide/Display Results Inbox Columns
- Change Number of Results Displayed Per Page
Process Results Inbox
- View and Print One Result
- View and Print Multiple Results at One Time
- View and Print Multiple Results at One Time Without Breaks
- View and Print With Face Sheet
- View Result Comments
- Add Comments to Results
- Post-Discharge Result and Star Icon
- Assign Results Inbox Items to Users
- Unassign Results Inbox Items
- Working with Results Inbox Check Boxes
- Move Results Out of Results Inbox (Archive)
Open Results Inbox

To open the Results Inbox, select Results from the menu bar. The Results Inbox opens.
Filters
Use filters to search the Results Inbox for documents. Select Filters to expand and collapse the filters section. You can save an unlimited number of filters.
For more information about filters, see the Filter Results topic.
Sort Results Inbox
Complete the following steps to sort the Results Inbox:
- Select a column heading.
- If you want to reverse the sort, reselect the column heading.
- If you want to sort by a different category, select that column heading.
Note the following sort information:
- An up arrow () indicates an ascending sort order, for example, a to z; 1 to 10; oldest date to most recent date.
- A down arrow () indicates a descending sort order, for example, z to a; 10 to 1; most recent date to oldest date.
Hide/Display Results Inbox Columns
The first time you access the Results Inbox, the default columns are displayed. There is a set list of available columns and a default subset of active columns for each inbox in the portal. You can hide or display each of the available columns in each of your inboxes.
Note: Once you change the default columns in an inbox, there is no automatic way to revert back to the default columns; you have to do it manually. Prior to making any column changes, make a note of the default columns. Then, once you hide/display columns and want to revert back to the default, refer to your notes and manually hide/display columns to match the default.
Click the Columns box: 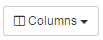 A dropdown menu opens and lists the available Results Inbox columns. The active columns are checked.
- To hide a column from view, click the check box next to the column name. The column is immediately hidden.
- To display a column that is hidden, click the check box next to the column name. The column is immediately displayed.
- When your organization turns on the Critical Results feature, the Critical Results column is displayed. You can deselect this column.
Tip: Your column selections persist until you change them.
Change Number of Results Displayed Per Page
Complete the following steps to select the number of results displayed per page:
- From the Results Inbox, select Page Size to view a list of page size options.
- Select a number from the list. The system refreshes the page and displays the requested number of results per page.
View and Print One Result
Complete the following steps to view and print one document from the Results Inbox:
- Open Results Inbox.
- Select one of the following options and complete the steps to select a result:
- Check Box Option
- Select the result's check box.
- Select View And Print to open the document viewer. The document is displayed.
- ID Option
- Select the result's document ID to open the document viewer. The document is displayed.
- Actions Menu Option
- Select Open from the result's Actions list to open the document viewer. The document is displayed.
- Select Print on the document viewer toolbar.
- Make your browser-specific print selections and print the result.
- Select Close to close the document viewer and return to Results Inbox.
- If you want to deselect the result, select its check box.
Note: Provider Portal does not support functions provided by your browser context menu such as print, select all, and copy. Your browser context menu is suppressed in the portal's document viewer. When you right-click in the document viewer, an "Unsupported Action" message is displayed. Click here for more information about printing in Provider Portal.
View and Print Multiple Results at One Time
Complete the following steps to view and print multiple documents at one time from the Results Inbox:
- Open Results Inbox.
- Select each result's check box.
- If you want to select all results on a page, select the column heading check box.
- Select View And Print to open the document viewer. The documents are displayed.
- Select Print on the document viewer toolbar.
- Make your browser-specific print selections and print the results. Page breaks occur between the results.
- Select Close to close the document viewer and return to Results Inbox.
- If you want to deselect specific results, select their check boxes.
- If you want to deselect all results on a page, use the column heading check box.
Note: Provider Portal does not support functions provided by your browser context menu such as print, select all, and copy. Your browser context menu is suppressed in the portal's document viewer. When you right-click in the document viewer, an "Unsupported Action" message is displayed. Click here for more information about printing in Provider Portal.
View and Print Multiple Results at One Time Without Breaks
Complete the following steps to view and print multiple documents at one time without page breaks from the Results Inbox:
- Open the Results Inbox.
- Select each result's check box.
- If you want to select all results on a page, select the column heading check box.
- Select View And Print Without Breaks to open the document viewer. The documents are displayed.
- Select Print on the document viewer toolbar.
- Make your browser-specific print selections and print the results. Page breaks do not occur between the results.
- Select Close to close the document viewer and return to Results Inbox.
- If you want to deselect specific results, select their check boxes.
- If you want to deselect all results on a page, use the column heading check box.
Note: Provider Portal does not support functions provided by your browser context menu such as print, select all, and copy. Your browser context menu is suppressed in the portal's document viewer. When you right-click in the document viewer, an "Unsupported Action" message is displayed. Click here for more information about printing in Provider Portal.
View and Print With Face Sheet
If you are authorized to view face sheets, you will see the View And Print With Face Sheet button in the Results Inbox. Note the following points about the View And Print With Face Sheet feature:
- If you select a single document, the face sheet is displayed (and printed) first, followed by the document.
- If you select multiple documents, the system groups them by visit and displays them in alphabetic order by patient last name and first name. For each patient visit, the face sheet is displayed (and printed) first, followed by the documents for the visit. If multiple documents are associated with one visit, only one copy of the face sheet is displayed (and printed).
Complete the following steps to view and print face sheets along with results:
- Open the Results Inbox.
- Select each result's check box.
- If you want to select all results on a page, select the column heading check box.
- Select View And Print With Face Sheet to open the document viewer. The face sheets and selected documents are displayed.
- Select Print on the document viewer toolbar.
- Make your browser-specific print selections and print the face sheets along with the results.
- Select Close to close the document viewer and return to Results Inbox.
- If you want to deselect specific results, select their check boxes.
- If you want to deselect all results on a page, use the column heading check box.
Note: Provider Portal does not support functions provided by your browser context menu such as print, select all, and copy. Your browser context menu is suppressed in the portal's document viewer. When you right-click in the document viewer, an "Unsupported Action" message is displayed. Click here for more information about printing in Provider Portal.
View Result Comments
A comments icon below a result check box indicates comments are associated with the document. 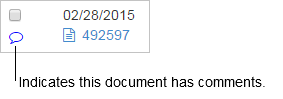
Click the comments icon to open the Comments dialog box and view result comments. You can also enter result comments. Another way to view or add result comments is to select Comments from the Actions list to the right of the result row. Click Close to return to Results Inbox.
Add Comments to Results
A comments icon below a result check box indicates comments are associated with the document.
Complete the following steps to add a comment to a result that does not have comments:
- From the Actions dropdown on the right side of the result row, select Comments. The Comments dialog box opens.
- Enter a comment in the Add Comments field. You are limited to 255 characters.
- If you want to save the comment, click OK. The comment is saved. You return to the Results Inbox.
- If you do not want to save the comment, click Close. You return to the Results Inbox.
Complete the following steps to add additional comments to a result:
- Click the comments icon . The Comments dialog box opens.
- Enter a comment in the Add Comments field. You are limited to 255 characters.
- If you want to save the comment, click OK. The comment is saved. You return to the Results Inbox.
- If you do not want to save the comment, click Close. You return to the Results Inbox.
Post-Discharge Result and Star Icon
A star icon below a result check box indicates a post-discharge result.
Assign Results Inbox Items to Users
To assign results to a Provider Portal user, click the check box next to each result, then click the Assign button: 
The Assign Item window opens. Under Select: click in the box to open the list of users. Select a user then click the Assign To This User button: 
An Assigned success window opens: 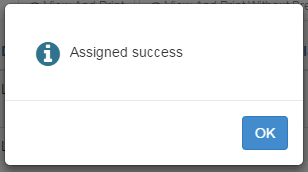
Click OK. You return to the Results Inbox. Look in the Assigned To column to see the assignments you made.
Unassign Results Inbox Items
To unassign results, click the check box next to each result, then click the Unassign button: 
An Unassign Selected success window opens: 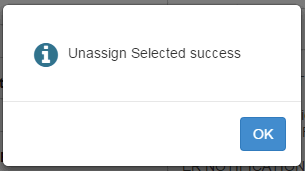
Click OK. You are returned to your Results Inbox. Look in the Assigned To column to see that the names of the previously Assigned To users have been removed.
Working with Results Inbox Check Boxes
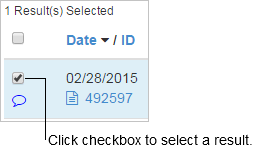
Use Check Boxes to Select Results
- To select a result, you can click the check box next to it:
- To select multiple results, click the check box next to each result.
- To select all results on the displayed page, click the column heading check box.
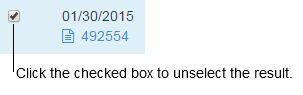
Uncheck Selected Results
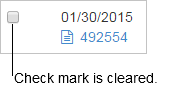
- To uncheck a selected result, click the check box at the left side of the result row:
- The check mark is cleared:
- To uncheck multiple selected results, click the check box next to each result to clear each check mark.
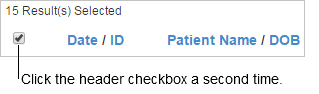
- To uncheck all selected results on the displayed page, click the column heading check box. All results on the displayed page are selected:

- Click the column heading check box again to clear the check mark:
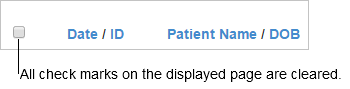
- All check marks on the displayed page are cleared:
- If all results on the displayed page are selected, click the column heading check box. All check marks on the displayed page are cleared.
Move Results Out of Results Inbox (Archive)
To reduce the size of your Results Inbox, move results out. This can increase the speed of your Results Inbox searches. The documents that you move will still be available in the Patient Archive. Note: This action does not delete documents from the system. Two ways to archive results are:
- Option 1: Click the check box next to each result, then click the Archive button:

- The Archive window opens. Click OK to Archive the documents. The screen refreshes and the results are no longer in your Results Inbox. The results are still accessible via the Patient Archive.
- Option 2: Open the document(s) (see View and Print One Result or View and Print Multiple Results at One Time). The document viewer opens displaying the document(s).
- Click the Archive and Close button at the bottom of the document viewer:

- The Archive window opens. Click OK to Archive the documents. The screen refreshes and the results are no longer in your Results Inbox. The results are still accessible via the Patient Archive.