Use secure messaging to communicate securely in the portal with configured practices, hospital groups, and patients. Messages can include documents, patient records, general correspondence, referrals, and more. You must be preauthorized to use the Secure Messaging feature. The Secure Messaging Inbox is shared and has the following tabs:
- Inbox for messages received
- Drafts for messages that are started, but not sent
- Sent for sent messages
- Archive for messages archived (removed) from one of the other tab views
- Notifications for notifications received (related to sending or receiving external messages)
Secure Messaging Help
- Open Secure Messaging Inbox
Organize Secure Messaging Inbox
- Filters
- Sort Secure Messaging Inbox
- Manage Inbox Columns
- Manage Page Size
Process Secure Messaging Inbox
- Open and Print Secure Message
- Open and Print Secure Message Attachments
- Create and Send Secure Message
- Global Patient Search and Secure Messaging
- Reply to Secure Message
- Forward Secure Message
- Save or Finish Secure Message Draft
- View and Print Sent Secure Message
- Change Secure Message Status
- Archive Secure Message
- View Archived Message
Open Secure Messaging Inbox
From the menu bar, select Secure Messaging. The Secure Messaging Inbox opens.
Filters
Use filters to search the Secure Messaging Inbox for messages. Select Filters to expand and collapse the filters section. You can save an unlimited number of filters.
For more information about filters, see the Filter Secure Messages topic.
Sort Secure Messaging Inbox
If you want to sort the Secure Messaging Inbox, you can select any column heading. An up arrow () indicates an ascending sort order, for example, a to z; 1 to 10; oldest date to most recent date. A down arrow () indicates a descending sort order, for example, z to a; 10 to 1; most recent date to oldest date.
Manage Inbox Columns
The first time you access the Secure Messaging Inbox, default columns are displayed. Each Provider Portal inbox has a set list of available columns and a default subset of active columns. You can hide or display each of the available inbox columns.
Note: If you change the default inbox columns, there is no automatic way to revert to the default. You must do it manually. Prior to making a change, note the default columns. If you want to revert to the default, refer to your notes and manually hide or display columns to match the default.
Complete the following steps to manage inbox columns:
- If you want to see all available columns, select Columns.
 Available columns are listed. Active columns are checked.
- If you want to hide a column, deselect the column's check box.
- If you want to unhide a column, select the column's check box.
Your column selections persist until you change them.
Manage Page Size
If you want to change the inbox page size, from the Page Size list, select the number of messages you want displayed per page.
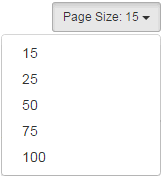 The system reloads the page and displays the requested number of messages per page.
Open and Print Secure Message
Complete the following steps to open and print a secure message:
- To open a message, select the message Subject or Actions > Open.
- To print the message, select Print.
- Make your browser-specific print selections and print the message.
See Also:
- Reply to Secure Message
- Forward Secure Message
- Archive Secure Message
Open and Print Secure Message Attachments
If the message includes attachments, you see a paper clip icon () at the beginning of the message row.
Complete the following steps to open and print a secure message attachment:
- To open a message, select its Subject or Actions > Open.
- Select an attachment. The document viewer opens and the attachment is displayed.
- From the document viewer toolbar, select Print.
- Make your browser-specific print selections and print the attachment.
- From the document viewer, select Close to return to the secure message.
Note: Provider Portal does not support functions provided by your browser context menu such as print, select all, and copy. Your browser context menu is suppressed in the portal's document viewer. When you right-click in the document viewer, an "Unsupported Action" message is displayed. Click here for more information about printing in Provider Portal.
Create and Send Secure Message
You can create a new secure message anywhere you see New Message.
Complete the following steps to create and send a new secure message:
- If you want to create a new message from the Secure Messaging Inbox, Results Inbox, Patient Search page, or Secure Messaging Inbox tab in the patient summary, from a row on the page, select Actions > New Message. The system opens a new message and populates it with the patient's information. Note the required field icon ().
- If you want to create a new message from the patient summary, select New Message in the upper-right corner of the Patient Summary view. The system opens a new message and populates it with the patient's information. Note the required field icon ().
- From the Type list, select a message type. You cannot add recipients until you select a message type.
- Select Add to add message recipients. Click here for more information about adding recipients.
- If you select a message type with an associated form, in the Form field select Edit Form. The system displays the secure message form. Forms are specific to a practice or hospital. The system displays No Form if the message type does not have an associated form.
- If you select Edit Form, complete the form and select OK when done. Required fields are yellow.
- If you want to send the message on behalf of someone, you can select a person from the On Behalf Of list.
- If you want to add attachments, select Add or Edit Attachments. Click here for more information about adding attachments.
- In the Subject box, enter a message subject, or use the default subject (if valued). Subject is required.
- In the secure message editor window, enter a message. Authorized users can use snippets (if available) to enter a message.
- If you want to use snippets to enter a message, you can select one or more snippets from the Snippets list. You may need to enter information to complete a snippet template before you send the message. See Use Snippets in Secure Message for more information.
- If the following check box message is below the secure message editor window, see the Relevant Health Information Check Box topic for more information:
 The check box message is relevant for Promoting Interoperability (previously known as meaningful use) Stage 3 secure messaging reporting.
- Select Send to send the message or Save Draft to finish later. Select Cancel to exit without sending or saving the message.
Global Patient Search and Secure Messaging
If you are authorized for Global Patient Search and have a valid search reason, you can use it to look for patients in the global repository. The global repository contains patient information from other organizations connected to your portal.
Complete the following steps to create a new secure message based on a Global Patient Search:
- Complete a Global Patient Search to find a patient. See the Global Search topic for more information.
- If you want to create a new message from the Patient Search page (or from the Secure Messaging Inbox tab in the patient summary), from a row on the page select Actions > New Message. The system opens a new message and populates it with the patient's information. Note the required field icon ().
- If you want to create a new message from the patient summary, select New Message in the upper-right corner of the Patient Summary view. The system opens a new message and populates it with the patient's information. Note the required field icon ().
- From the Type list, select a message type. You cannot add recipients until you select a message type.
- Select Add to add message recipients. Click here for more information about adding recipients.
- If you select a message type with an associated form, in the Form field select Edit Form. The system displays the secure message form. Forms are specific to a practice or hospital. The system displays No Form if the message type does not have an associated form.
- If you select Edit Form, fill out the form and select OK when done. Required fields are yellow.
- If you want to send the message on behalf of someone, you can select a person from the On Behalf Of list (may be required).
- If you want to add attachments, select Add Attachments. Click here for more information about adding attachments.
- In the Subject box, enter a message subject, or use the default subject (if valued). Subject is required.
- In the secure message editor window, enter a message. Authorized users can use snippets (if available) to enter a message.
- If you want to use snippets to enter a message, you can select one or more snippets from the Snippets list. You may need to enter information to complete a snippet template before you send the message. See Use Snippets in Secure Message for more information.
- If the following check box message is below the secure message editor window, see the Relevant Health Information Check Box topic for more information: The check box message is relevant for Promoting Interoperability (previously known as meaningful use) Stage 3 secure messaging reporting.
- Select Send to send the message or Save Draft to finish later. Select Cancel to exit without sending or saving the message.
Reply to Secure Message
Complete the following steps to open a secure message from the Secure Messaging Inbox and reply to it:
-
In the message row, select Actions > Reply. The system displays the Reply to Secure Message page. Alternatively, you can select the message's Subject. The system displays the message.
- If you selected message Subject in Step 1, select Reply. The system displays the Reply to Secure Message page.
- If you want to add message recipients, select Add. Click here for more information about adding recipients.
- If you want to reply to the message on behalf of someone, you can select a person from the On Behalf Of list.
- If you want to add attachments, select Add Attachments. Click here for more information about adding attachments.
- In the secure message editor window, enter a message. Authorized users can use snippets (if available) to enter a message.
- If you want to use snippets to enter a message, you can select one or more snippets from the Snippets list. You may need to enter information to complete a snippet template before you send the message. See Use Snippets in Secure Message for more information.
- If the following check box message is below the secure message editor window, see the Relevant Health Information Check Box topic for more information: The check box message is relevant for Promoting Interoperability (previously known as meaningful use) Stage 3 secure messaging reporting.
- If you want to see the last message, select the Last Message tab.
- Select Send to send the reply or Save Draft to finish later. Select Cancel to exit without sending or saving the reply.
Forward Secure Message
Complete the following steps to open a secure message from the Secure Messaging Inbox and forward it:
- In the message row, select Actions > Forward. The system displays the Forward Secure Message page. Alternatively, you can select the message's Subject. The system displays the message.
-
If you selected message Subject in Step 1, select Forward. The system displays the Forward Secure Message page.
- Select Add to add message recipients. Click here for more information about adding recipients.
- If you want to forward the message on behalf of someone, you can select a person from the On Behalf Of list.
- If you want to add attachments, select Add Attachments. Click here for more information about adding attachments.
- In the secure message editor window, enter a message. Authorized users can use snippets (if available) to enter a message.
- If you want to use snippets to enter a message, you can select one or more snippets from the Snippets list. You may need to provide information to complete a snippet template before you can send the message. See Use Snippets in Secure Message for more information.
- If the following check box message is below the secure message editor window, see the Relevant Health Information Check Box topic for more information: The check box message is relevant for Promoting Interoperability (previously known as meaningful use) Stage 3 secure messaging reporting.
- If you want to see the last message, select the Last Message tab.
- Select Send to forward the message. Select Cancel to exit without forwarding the message.
Save or Finish Secure Message Draft
When creating a new secure message, if message type is valued, you can save a draft of the message. You can also save a draft when replying to a secure message.
To save a secure message draft, select Save Draft below the message window.
Complete the following steps to finish a secure message draft:
- From the Secure Messaging Inbox, select the Drafts tab. The system displays all draft messages.
- If you want to search for a draft message, apply search filters. Click here for more information about applying search filters.
- If you want to sort the draft messages displayed on the page, you can select any column heading. An up arrow () indicates an ascending sort order, for example, a to z; 1 to 10; oldest date to most recent date. A down arrow () indicates a descending sort order, for example, z to a; 10 to 1; most recent date to oldest date.
- If you want to hide or unhide columns, complete the Manage Inbox Columns steps.
- If you want to change the number of messages displayed per page, see Manage Page Size.
- To open a draft message, select its Subject or Actions > Open. The draft message is displayed on the Edit Draft page. Finish the message.
- On the Edit Draft page, select Send to send the message.
View and Print Sent Secure Message
Complete the following steps to view and print a secure message that was sent:
- From the Secure Messaging Inbox, select the Sent tab. Sent messages are displayed.
- If you want to search for messages, apply search filters. Click here for more information about applying search filters.
- If you want to sort the messages displayed on the page, you can select any column heading. An up arrow () indicates an ascending sort order, for example, a to z; 1 to 10; oldest date to most recent date. A down arrow () indicates a descending sort order, for example, z to a; 10 to 1; most recent date to oldest date.
- If you want to hide or unhide columns, complete the Manage Inbox Columns steps.
- If you want to change the number of messages displayed per page, see Manage Page Size.
- To open a message, select its Subject or Actions > Open.
- To print the message, select Print.
- Make your browser-specific print selections and print the message.
Change Secure Message Status
Complete the following steps to change secure message status in the Secure Messaging Inbox:
- Select the Inbox tab.
- If the Status column is not displayed, from the Columns list, select the Status check box. The Status column is displayed.
- Complete the following steps if you want to change the status of one message:
- From the message's Status list, select a status. The system displays the Change Status message box.
- Select OK to change the status.
- Complete the following steps if you want to change multiple messages to the same status at one time:
- Select each message's check box.
- From the Change Status list, select a status.
 The system displays the Change Status message box.
- Select OK to change the statuses.
Archive Secure Message
You can archive messages from the Inbox and Sent tabs in the Secure Messaging Inbox. You can also archive Inbox and Sent messages once you open them. Messages that you archive can be viewed from the Archive tab in the Secure Messaging Inbox. Click here for information about viewing archived messages.
Complete the steps under one of the following options to archive messages from the Inbox or Sent tabs:
Option 1: Complete the following steps to archive one or more messages at a time from the Inbox or Sent tabs:
- Select each message's check box.
- Select Archive.
- On the Archive confirmation message, select OK.
Option 2: Complete the following steps to archive one message at a time from the Inbox or Sent tabs:
- In the message row, select Actions > Archive.
- On the Archive confirmation message, select OK.
Complete the following steps to open and then archive an Inbox or Sent message:
- To open a message, select its Subject or Actions > Open.
- Select Archive.
- On the Archive confirmation message, select OK.
View Archived Message
Complete the following steps to view archived messages:
- Select the Archive tab.
- If you want to search for messages, you can apply search filters. Click here for more information about applying search filters.
- If you want to sort the messages displayed on the page, you can select any column heading. An up arrow () indicates an ascending sort order, for example, a to z; 1 to 10; oldest date to most recent date. A down arrow () indicates a descending sort order, for example, z to a; 10 to 1; most recent date to oldest date.
- If you want to hide or unhide columns, complete the Manage Inbox Columns steps.
- If you want to change the number of messages displayed per page, see Manage Page Size.
- To open a message, select its Subject or Actions > Open.